
3 ways to Start Stitching
New to stitching or just here to find out new ways? Don’t worry - it can feel a little overwhelming at first, but we’ve got you covered. Here are three simple ways to thread your needle and dive into your first stitches.

Embroidery Thread
Embroidery thread comes with 6 strands, for cross-stitching you usually use 2 strands. Always check your pattern. These instructions assume 2 strands are used, adjust as needed.
Related | How to Cross Stitch
Knot Method
Starting your stitching with a knot, is a common place to start and secure the thread. Here is a simple way to do it.
Cut about 40cm thread
Pull 2 strands out of the thread
Thread the 2 strands through your needle (we use a size 22 needle)
Knot the end
Insert your needle into the fabric from the back side - so the knot is hidden on the underside
Pull the thread all the way through until the knot stops at the fabric
You have now secured the your work with a knot, and can start stitching.
Weaving Method
This is a neater way to get started, and is good for when you are starting in the middle of a project. It helps you stay super tidy on the back of your work.

Cut about 40cm thread
Pull 2 strands out of the thread
Thread the 2 strands through your needle
Do not knot the end
Insert your needle into the fabric from the back side and pull the thread partly through
Leave a tail of about 4cm on the back side, and hold this flat with your finger
As you start stitching, cover the tail with the stitches on the back side
Go slowly, so you do not pull the tail through
After a 3 or 4 stitches you can remove your finger and it should be secure
Trim any excess
You have now secured your work, and can start stitching
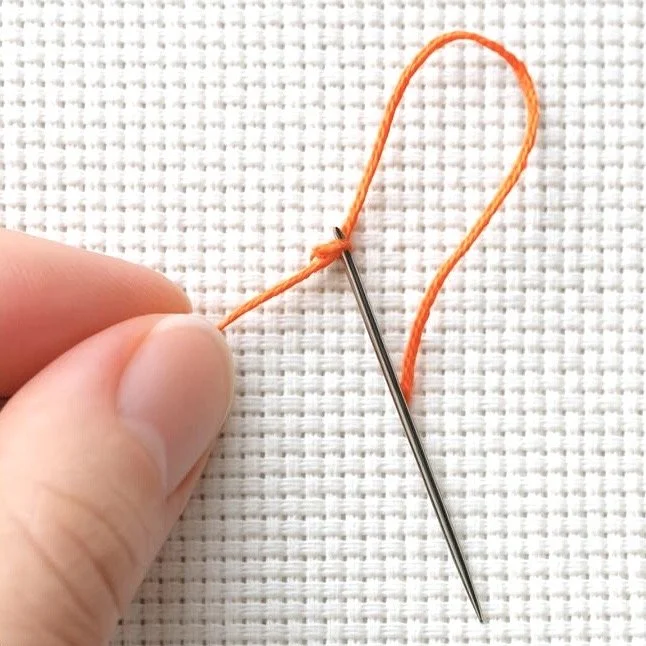
Loop Method
This is a way to start without a knot, or a tail. You will find it neater and easier to control how to start. This is best for even weave/ aida fabric, using an even number of strands.

Cut about 80cm thread
Pull 1 strand out of the thread
Fold it in half so both the ends meet and you have a loop at the bottom
Thread the loose ends through your needle
Insert your needle into the fabric from the back side and pull the thread partly through, leaving 4cm of the loop at the back side of the fabric
Go down at the first stitch point making this shape (/)
Now both the needle and the loop will be at the backside of the fabric
Pass your needle through the loop and pull it - this secures an anchor without a knot
You have now secured your work, and can start stitching.
No matter how you choose to stitch, the most important thing is to enjoy the process and have fun with your project.
You can find extra templates, and free projects on Makers Mob UK website: www.makersmob.uk and content on our Instagram Page: @makersmob.uk